After a recent interview with Anita Klein PPRE Hon. RWS, we took a ‘behind the scenes’ virtual tour of her studio, and gained some insight into her work and process.
Below is a little step-by-step guide of Anita's Linocut printing process, as seen in the video above!
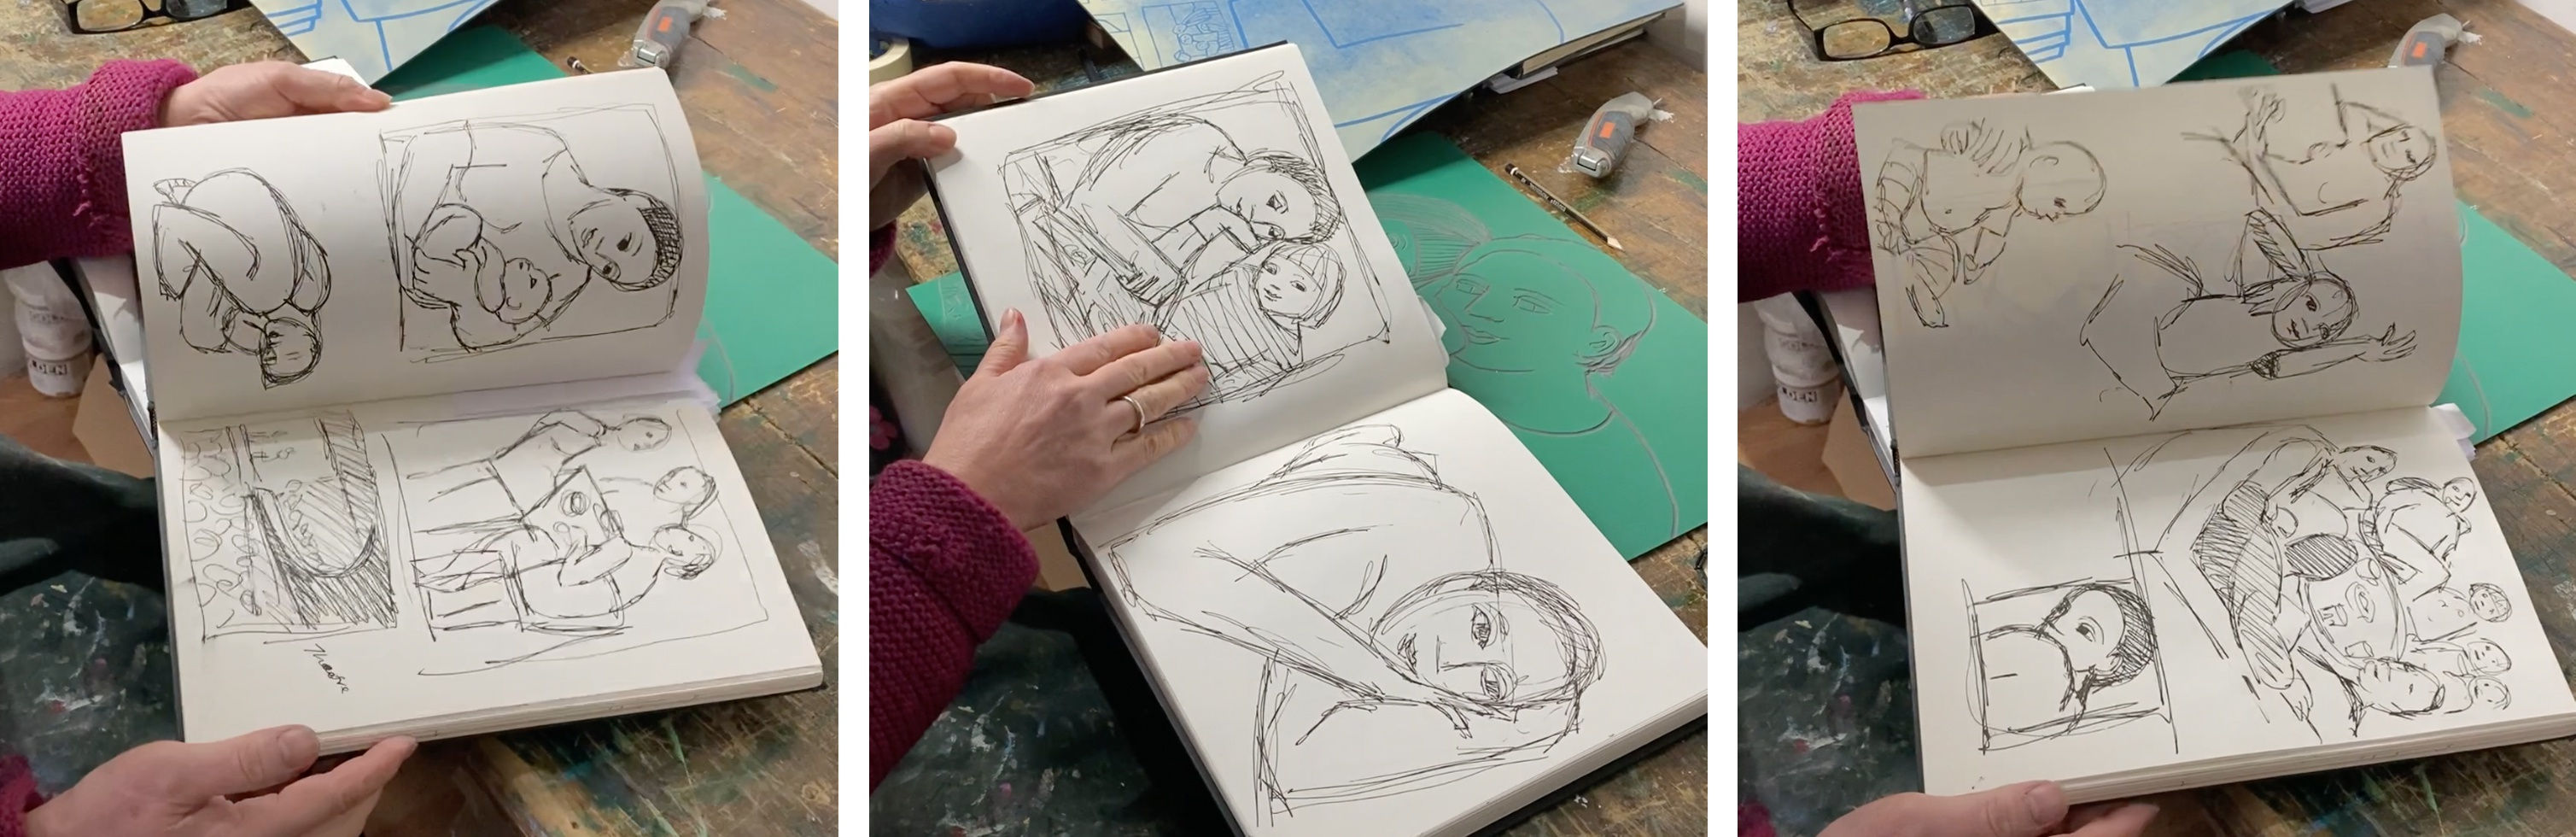
1. Sketchbooks
For Anita, everything starts with a drawing. She has been keeping sketchbooks for over 40 years, drawing as and when she has ideas and inspiration. She uses these drawings as her raw material.
2. Paintings
As well as being a printmaker, Anita is also a painter. She will often create a painting using her sketches as a starting point - she finds that some paintings lend themselves to further exploration as prints, which was the case with this particular print.

3. Transferring onto Lino
Anita re-drew the sketch from her sketchbook, scaled-up to the size of her block of Lino, making various corrections to perfect the composition. A Linocut print is made using blocks of Lino, the surface of which the artist draws and then carves into. The areas of the Lino to be inked and printed are left uncut, while the areas not intended to take the printing ink are cut away.
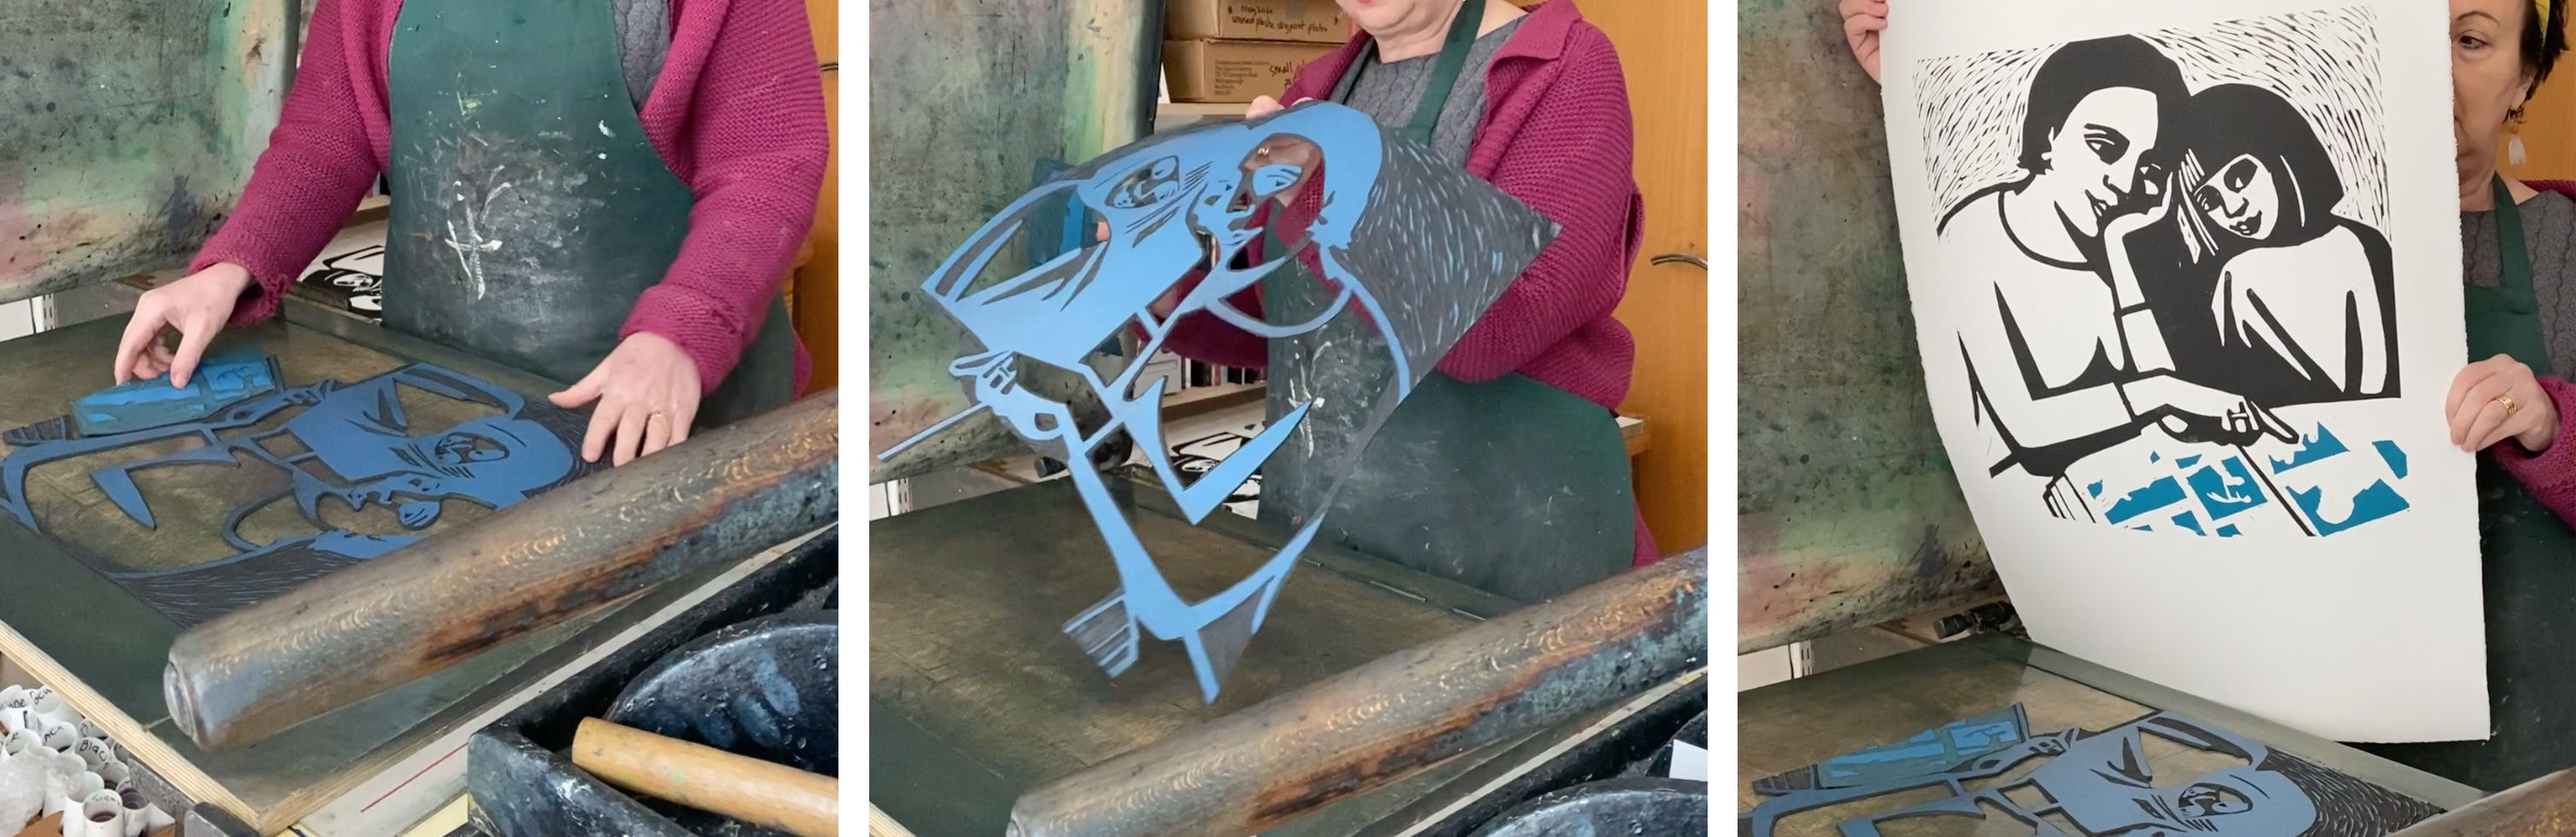
4. Adding the first colours
Each of Anita’s Linocut prints are made up of different colour combinations. To be able to print multiple colours in one go, she cuts up her Lino like a jigsaw. For this particular print, Anita started out with two colours; Black and Turquoise. After printing these first colours, she waits for the ink to dry (which can take up to a week!) before adding additional colours.
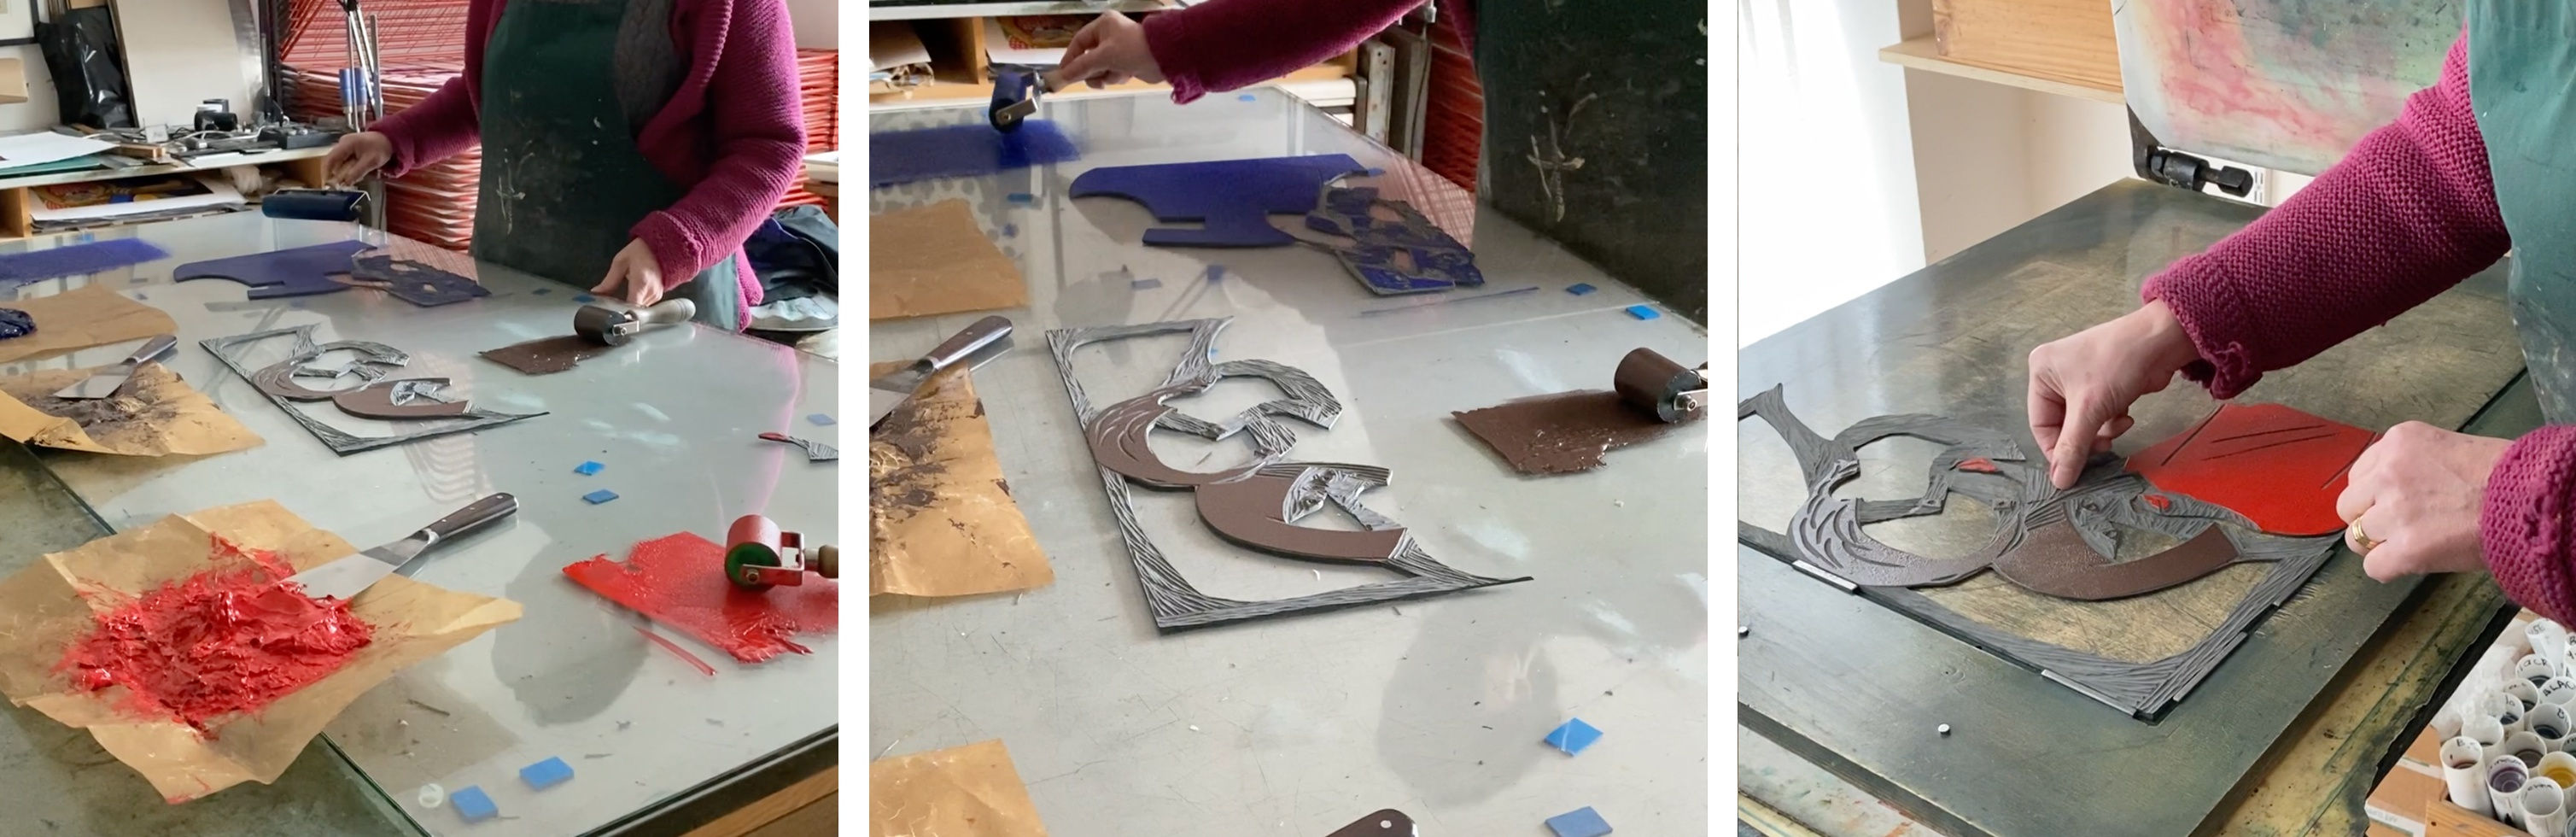
5. More colours...
Once these first colours had dried, Anita added a further three colours; Blue, Brown and Red. After inking them all separately, she pieces them together on the printing press, carefully placing the paper down on top.
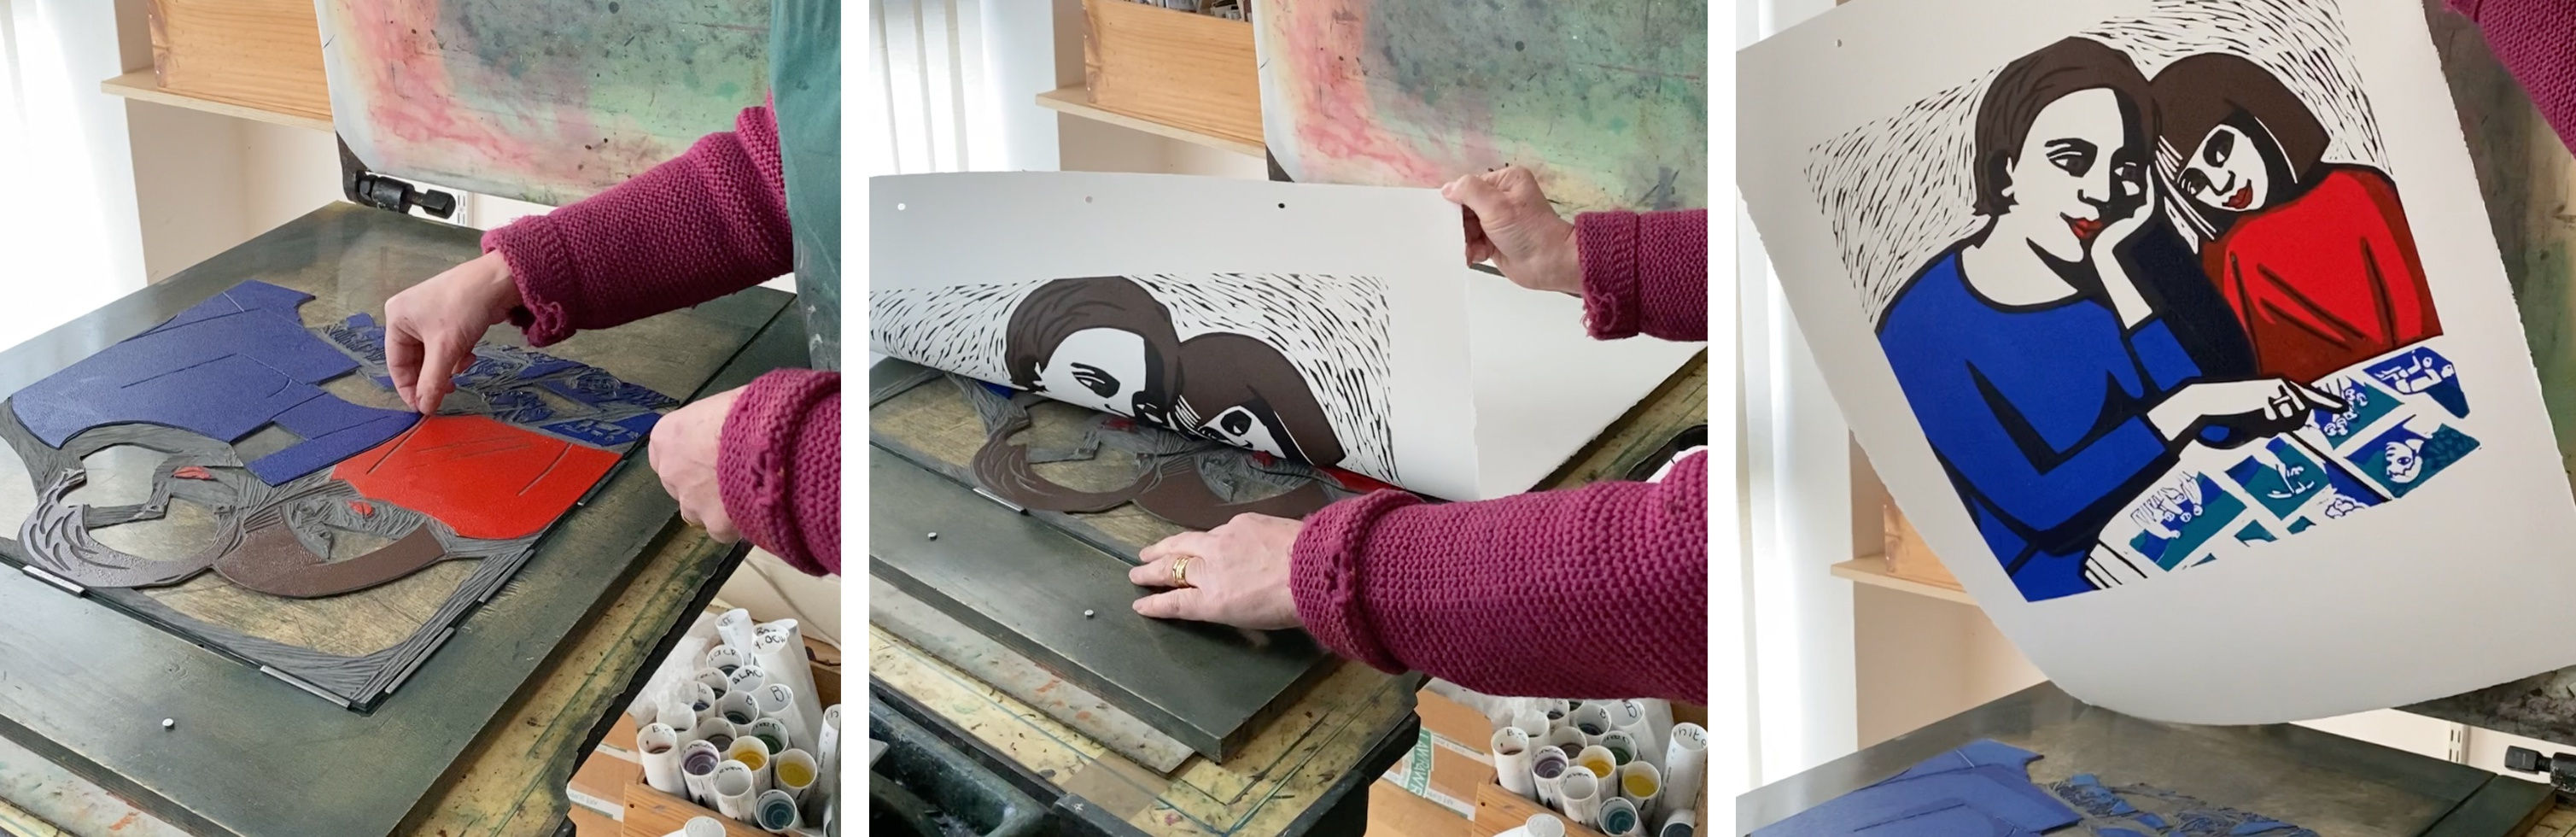
6. Deciding the next move
After passing through the printing press, it's time to peel back the paper and see the five colours in total combined. With all of her prints, Anita only cuts subsequent blocks of Lino one at a time after seeing how each colour prints. For this piece, she still has a further two blocks with two or three colours on each still to come for the finished print.
Want to see more of Anita's work? Head to her page here.
Make sure to watch the full video above, follow us on Instagram and subscribe to our Youtube channel for more 'In the Studio' features!
More like this on the Blog...
Read / Watch: Relief Printing: In the Studio with Trevor Price RE
Read / Watch: Abstract Art: In the Studio with Lisa Traxler RWS
Read / Watch: Linocut Printing: In the Studio with Gail Brodholt RE
Read / Watch: Linocut & Woodblock Printing: In the Studio with Laura Boswell ARE